I have had quite a few people ask me exactly what I do with the sheds I find. Whether I find single sheds to the ever-exciting pair, I like to experiment with a handful the never ending possibilities of what you can do with these things – from chandeliers to chairs to a simple sit-about. I tend to take a less-is-more approach, but that doesn’t mean you can’t create something fantastic. So, I figured I would give you a little miniseries and some DIY for all those sheds you find!
First thing’s first – cleaning. A lot of times sheds will be pretty dirty when you find them, unless they are pretty fresh and haven’t had a lot of time to weather/get moved around and gnawed on by critters. Either way, you’ll probably want to give them at least a little scrub down. Most of the time, warm water and a dishtowel will do the trick. But, when you’re dealing with a super dirty antler, you’ll have put in a little more elbow grease.
To get yourself started, add some mild dish soap to warm water to a plastic container large enough to hold the sheds. I lined mine with a trash bag to prevent leaks. Here, I am working with the pair I found this year, and one single I picked up during turkey season. This guy will hopefully be a nice 10-point before too long. You can jjuuuuust see the start of that little kicker on the second tine. The pair wasn’t too terribly dirty, but one side had been sitting in the dirt while the other was exposed to the sun, so they were pretty uneven. The single was… It was just gross. Bleh.


Once they have soaked for a bit, long enough to help loosen all the dirt and other grime, remove the sheds from their bubble bath and rinse with clean water. Then, use a clean dishtowel to wipe them down and remove as much of the dirt as you can. If the dishtowel isn’t enough, you can use a coarse sponge or extra-fine steel wool. I had to use both… Nine times out of ten, you’re good to go from here.

But wait. What’s that on the ground next to me, you ask? A screwdriver? Why yes. Yes it is. Antlers have all sorts of little grooves and nooks and crannies towards the base, which can trap a medley of filth that you just might not want hanging out inside your house. One side of the pair was particularly dirty, and a flat-head screwdriver was the only thing I could find to do the trick. It sounds like a lot of work, but I promise it doesn’t take that long once you get started. The bubble bath soak really helps speed things along, and I just used a little clean water to rinse along the way.

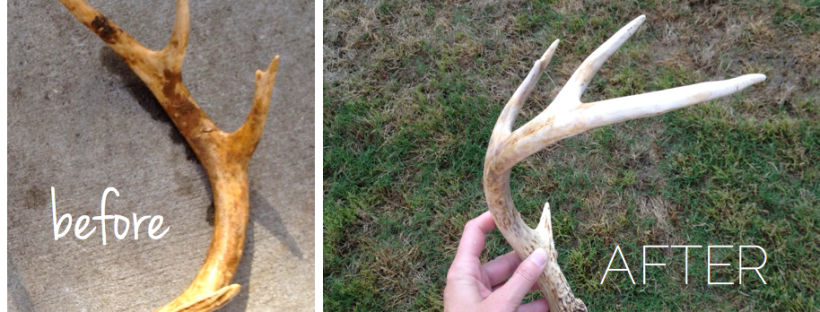
I like them to still look as natural as they can (even if they aren’t the traditional woodsy brown anymore), so I made sure not to make them too white.

See what a difference a good cleaning can make?
1 sawtooth picture hanger
2 small nails (to fit sawtooth hanger)
First, hold the antler up against a flat surface, like your wall, to see where the best (i.e. flattest) place is to put the sawtooth hanger. Once you’ve found a good spot, hold the hanger against the antler and use a pencil to make marks inside the nail holes on either side. You’ll need them to be a pretty exact distance apart. Then, use a drill to create little holes for the 2 tiny nails. You don’t want them to go all the way through the antler, though. I don’t know a lot about drills, so I had John do that part because he knew the correct sizes and whatnot. You’re probably more tool-savvy than I could try to be. Then, attach the sawtooth to the antler with the nails. Easy!


Isn’t that just the most nifty thing? I am obsessed with it, and already have plans to make a few more just like this to hang around the house and give as gifts. John, I hope you don’t aren’t super attached to your tie rack!
Read this a while back…good stuff….Your west coast fan club is looking forward to the next post!!!! Look forward to seeing you before too long!